2. Operating Procedures
2.3. Disk Image creation
A "Disk Image" is a copy of the drive saved in a file or set of files.
A Disk Image is used for backup/restore purposes as well as for the analysis and recovery of deleted files.
A Disk Image for the whole Hard Disk Drive or for a particular partition (or logical drive) can be created using Active@ Disk Image software.
Starting Disk Image creation process
- Start Active@ Disk Image
- Select the device, for example "Hard Disk Drive (80h)", if you want to create image of the whole hard disk (HDD/SSD) or Select the logical drive, for example "Local Disk (C:)", if you want to create image of the particular partition (volume)
- Verify source disk parameters (name, serial, file system, size, etc) on the right side. If you want, you can press [ENTER] to scan a partition and preview files located there (for logical drives only).
- Press [Ctrl]+[I] to create Raw Image.
Raw image is an image containing all drive's data — a mirror of drive's surface stored in one file or set of files.
It includes used as well as unused clusters and sectors. This means that all existing and even some deleted files will be copied to the image. A raw image is usually larger than a Data Image, but contains all information on the disk. Not one bit of data is missed in this case.
or press [Ctrl]+[D] to create a Data Image (for logical drives and partitions only).
Data Image — an image containing only the drive's used clusters. When you recover the Data Image later on, all unused clusters will be zeroed.
This approach can save you space and increase the speed of the disk image creation.
Create Image dialog appears:

- You can see image type: [Raw] and source: [Local Disk (C:)] at the dialog title.
- You can type your description for an image to be created. In the example above the description typed is "My System Disk Image"
- You can move between the dialog controls via [TAB] and [SHIFT]+[TAB] keys
- You can choose a compression type using arrows keys:
- None — Fast method but takes lots of space. The space required is equal to the size of the drive to be imaged. However, this format is compatible with most of the other tools available.
- Minimum — Relatively fast. Speed of image creation takes precedence over size of output image
- Medium — Speed and size of image creation have equal priorities
- Maximum — Size of resulting image takes precedence over speed of image creation
In the example above Maximum compression method is chosen.
- You can specify a location of resulting image using [TAB] key to move through the Drives: and Folders: controls and arrows to select a particular Drive and Folder. Press [ENTER] to enter the folder or subfolder if you want to. You will see all local and attached network drives as a destination for the image. In the example above location "H:\My Documents" is chosen.
- Type resulting file name into Image File: box. In the example above
"C-image.dim" is chosen.
- Move cursor to [ OK ] button and press [ENTER] or [Space] to start disk image creation process.
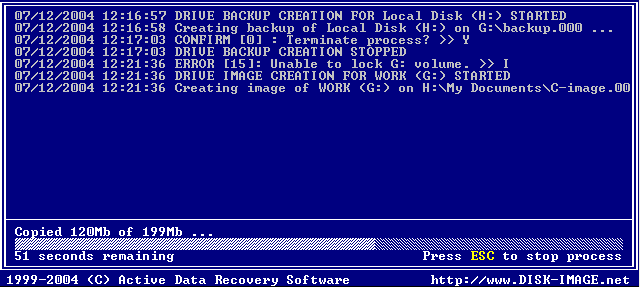
You can see a progress of image creation and stop the process anytime by pressing [ESC]:
