2. Operating Procedures
2.4. Disk Image Restoration
Follow 4 easy steps to restore your Hard Disk Drive or Logical Drive (Partition).
Step1
- Start Active@ Disk Image
- Press [Ctrl]+[R] to launch Disk Image Restoration dialog:
Step2
1. You have created an image using Active@ Disk Image earlier
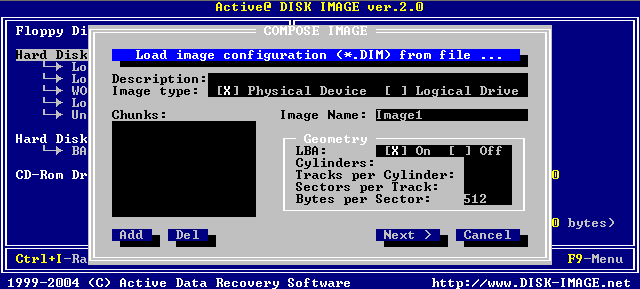
If you have created an image using Active@ Disk Image earlier (there is a valid configuration (*.DIM) file), press [ENTER] or [Space] to load image info from the image configuration file:
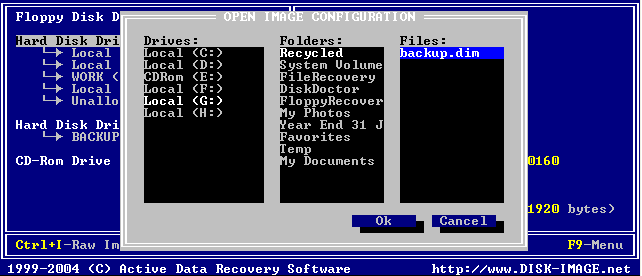
- Use arrows and [TAB] key to move between drives and folders tree. When you have found and selected valid *.DIM file in Files: box, press [ENTER]. In the example above "backup.dim" file located on "G:\" is chosen.
- Information from the image configuration file will be loaded into the memory and you will see image parameters in dialog:
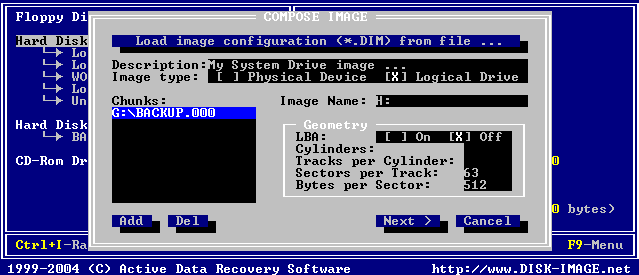
- Verify image parameters: Description, type, chunks, geometry and press [NEXT>]
2. You have created an image using previous v. 1.0 of Active@ Disk Image or other tools.
If you have created an image using previous v. 1.0 of Active@ Disk Image or other tools (i.e. you don't have a configuration *.DIM file), you are to compose an image from chunks and set up image parameters properly before you can start image restoration:
Use [TAB] and arrows to move through dialog controls and specify the following parameters
- Image Type: Physical Device (for HDD) or Logical Drive (for a partition)
- Chunks: press [Add] button to locate and add all drive image's chunks to the list.
Chunks may be located on one drive or on different locations
- Drive Geometry (for HDD/SSD images only)
Despite that you can manually specify list of data chunks and set image parameters, we urge you to always to use .DIM files.
Step3
Destination Drive dialog will appear:
Restoring a disk image of a Hard Disk Drive
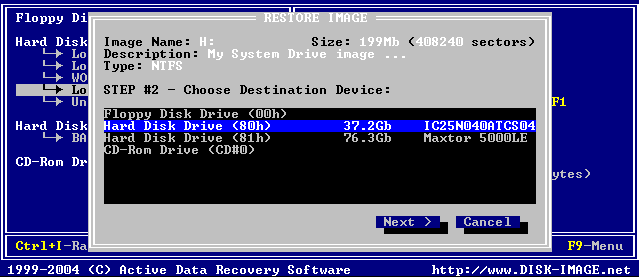
Using arrows, select the Hard Disk where you want to restore the image to and press [NEXT>].
Restoring a disk image of a partition (logical drive)
If you are restoring a disk image of a partition (logical drive), Destination Partition dialog will appear:
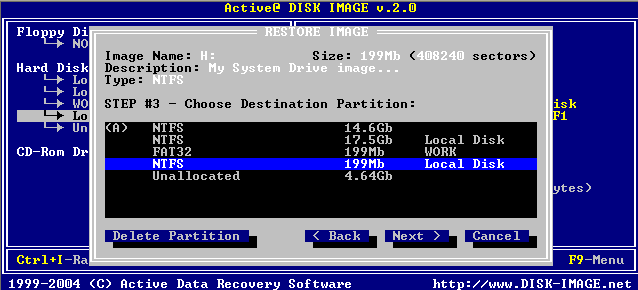
You can:
- select an existing partition (having an equal or larger size) to restore the disk image to
- restore it to Unallocated space
- delete an existing partition and restore to the Unallocated space that will appear
- set the Active flag to assign boot priority to the partition being restored
Step4
Confirming Restoration
After pressing [NEXT>] you will see a final confirmation dialog:

- Type: RESTORE (case-sensitive, in uppercase) and press [ENTER] to proceed with disk image restoration. Be careful, data located on the drive where you want to restore image to will be completely overwritten by image data, and no recovery would be possible thereafter.
- You will see the progress of the image restoration. To stop the process anytime - press [ESC].
- After restoration is complete you will be prompted to reboot the machine.